Welcome to DispatchCore
DispatchCore is built for small contractor teams — HVAC, plumbing, electrical, and general contracting crews of 1 to 20 technicians. This guide walks you through everything you need to start dispatching jobs in minutes, not weeks.
There are two parts to DispatchCore:
- Web Dashboard — The dispatcher's command center. Create jobs, manage your schedule, track your crew, and send invoices from any browser.
- Mobile App — Your technicians' daily tool. View assigned jobs, update status, capture photos, collect signatures, and work fully offline.
Both stay in sync in real time. When a dispatcher assigns a job, the tech sees it immediately. When a tech updates their status, the dispatcher sees it on the board.
Creating Your Account
Sign up at app.dispatchcore.io with your email address. No credit card required. DispatchCore is free during beta — you'll get immediate access to the full platform with no limits.
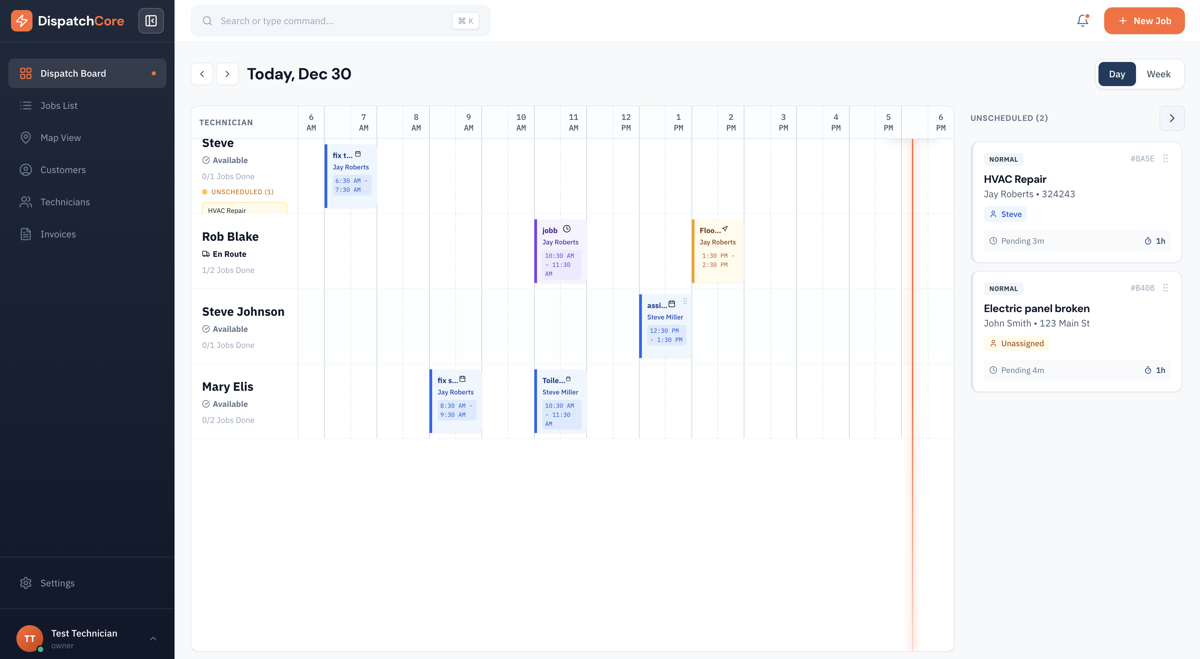
After creating your account, you'll land on the dispatch board — the central hub of DispatchCore.
Adding Your Team
Navigate to the Technicians page from the sidebar. Click "Add Technician" and enter each team member's name, email, and phone number. They'll receive an email invitation to download the mobile app and create their account.
Each technician you add appears as a row on your dispatch board, ready to receive job assignments. There's no limit on how many technicians you can add — your flat monthly rate covers everyone.
Creating Your First Job
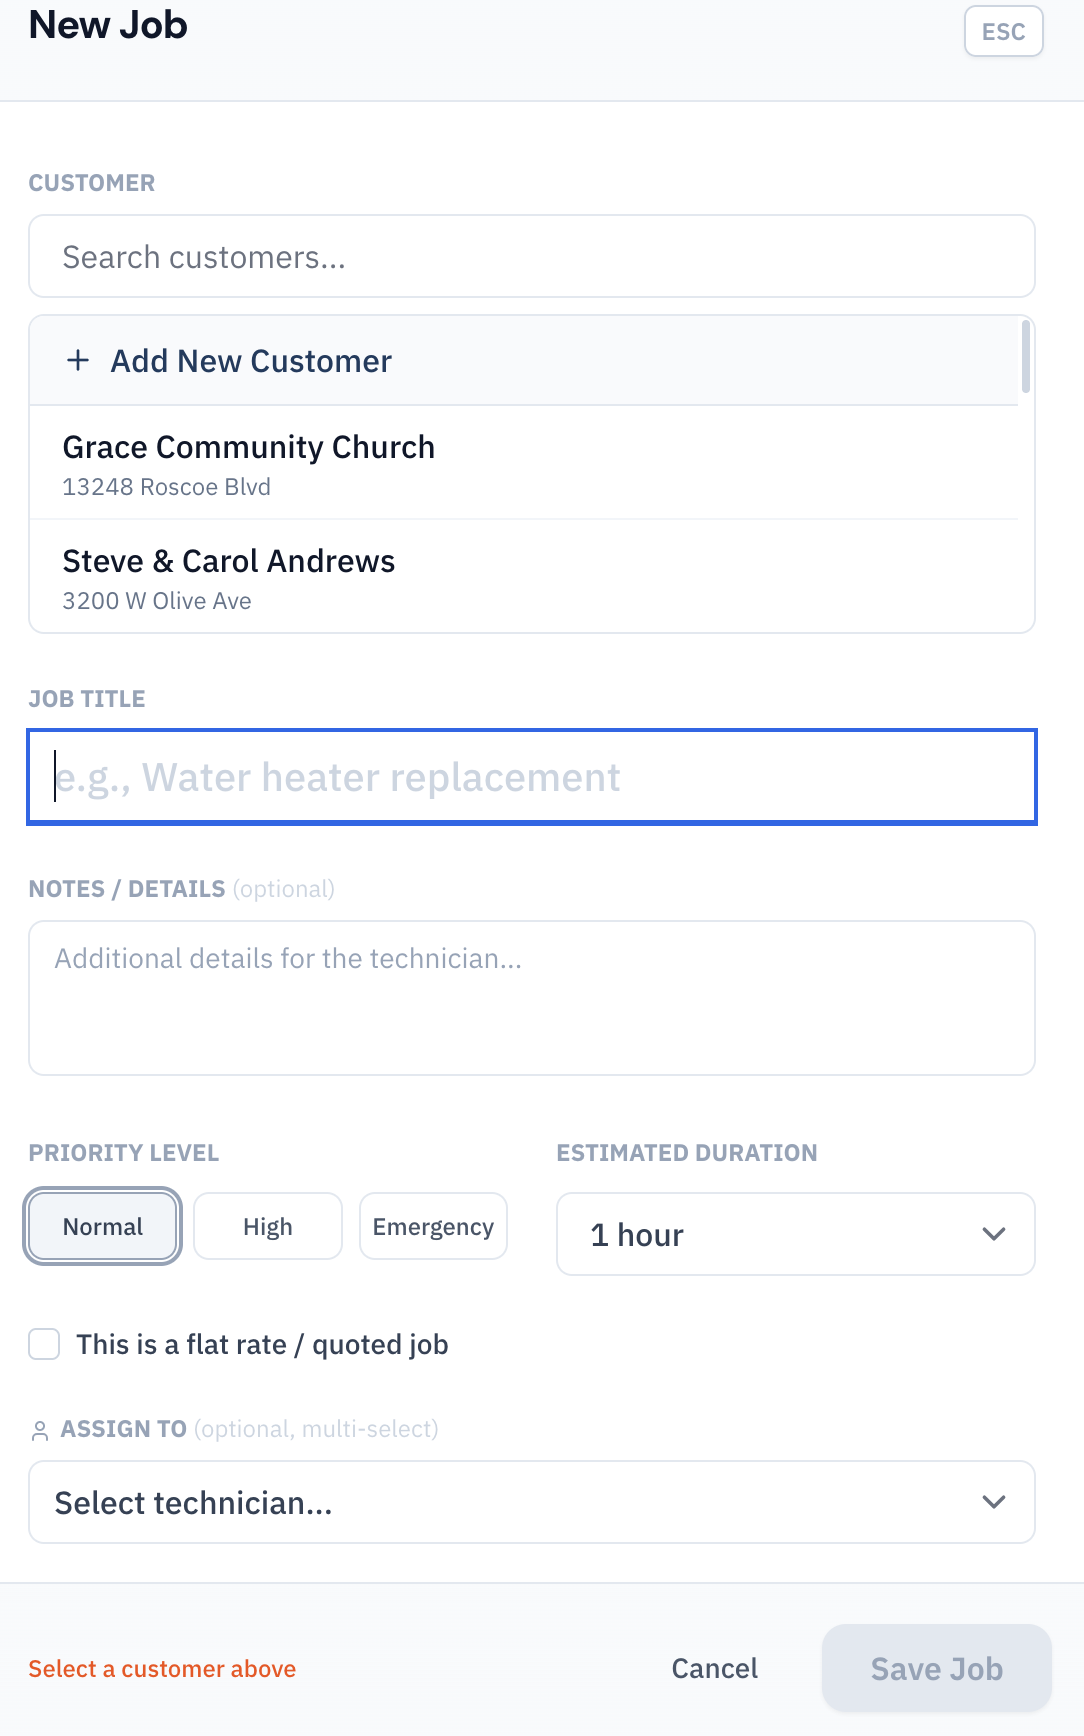
There are two ways to create a job:
- From the Jobs page — Click "Create Job" and fill in the customer info, job title, description, scheduled date/time, and priority level.
- From the Dispatch Board — Click on any empty time slot on a technician's row to create and assign a job in one step.
Every job includes:
- Customer — Name, address, phone, and any special notes (gate codes, pet warnings, etc.)
- Job details — Title, description, estimated duration
- Priority — Normal, High, or Emergency (color-coded on the board)
- Scheduled date and time — When the work should happen
- Technician assignment — Who's doing the work (single tech or multiple)
Dispatching the Job
Once a job is created, assign it to a technician by dragging it onto their row on the dispatch board. The tech receives the assignment on their mobile app and can see all the job details, customer info, and any notes you've added.
That's it — you're dispatching. The rest of this documentation covers every feature in detail, but the core workflow is always: create a job → assign a tech → track progress → invoice the customer.
Quick Tips
- Command Bar — Press ⌘K (Mac) or Ctrl+K (Windows) anywhere in the dashboard to quickly search for jobs, customers, or navigate to any page.
- Keyboard Shortcuts — On the dispatch board, press D for day view, W for week view, M for month view, T for today, and arrow keys to navigate dates.
- Bookmark the board — The dispatch board at /dispatch is where most dispatchers spend their day. Bookmark it for quick access.